
Testing smart sump pump sensors is simpler than you might think. You can prove they work in a few easy steps using a bucket of water and your phone.
Check the sensor response by triggering the float or water level and watching for an immediate alert or pump activation. That quick test tells you if the sensor, connection, and alert system are working.

You’ll keep water out of your basement when you test sensors regularly and follow simple maintenance checks. This post walks you through what to prepare, how to run safe tests, how to read results, and what to fix if something fails.
Key Takeaways
- Test sensors by simulating high water and confirm alerts or pump action.
- Prepare by checking power, connections, and app notifications.
- Fix issues promptly and schedule regular checks to avoid failures.
Understanding Smart Sump Pump Sensors
Smart sensors track water level, pump activity, and leaks. They warn you before flooding and log events so you can spot repeat problems.
Types of Smart Sensors
You’ll find three common sensor types for sump systems:
- Water level sensors: Float switches or infrared probes sit in the sump basin and report rising water levels. Floats trigger at set heights; probes give continuous readings.
- Power/monitor modules: Devices that plug into the outlet measure pump run time, cycle rate, and current draw. They alert you to failed starts or short cycling.
- Leak/remote sensors: Small discs or cable sensors sit on the floor or near walls. They detect moisture outside the basin and send instant alerts.
Choose sensors that match your pump type and installation. Battery-backed wireless units work where running wire is hard.
Hardwired or plug-in modules suit connected basements with stable power.
How Smart Sensors Operate
Sensors send data through Wi‑Fi, Z‑Wave, Zigbee, or proprietary radio. Your hub or phone app receives readings and pushes alerts when thresholds are hit.
Water level sensors either switch on/off (float) or output numeric level (probe). Power modules measure amperage and runtime; a stalled motor or unusually long run triggers a fault alert.
Leak sensors use conductive contacts that close when wet. Many sensors support push notifications, email, and local alarms.
They also log events so you can review pump cycles, power failures, or repeated alarms. Check battery status and signal strength during testing to avoid false negatives.
Key Benefits of Smart Sensors for Sump Pumps
You get early warnings and actionable data.
- Faster response: Instant alerts let you call for help before water reaches living areas.
- Fault detection: You’ll see failed starts, stuck floats, or blocked discharge lines by abnormal run patterns.
- Maintenance insights: Cycle counts and run durations tell you when to clean the basin or service the pump.
- Remote monitoring: Check status from anywhere and share logs with technicians.
Pick sensors with clear alerts, good battery life, and a reliable communication method for your home. Prioritise compatibility with your pump and your preferred smart-home platform.
Preparing to Test Smart Sump Pump Sensors
You will check safety, gather a few simple tools, and perform a quick visual and electronic inspection before testing. Focus on power, wiring, sensor placement, and app connectivity so tests run smoothly.
Safety Precautions
Always cut power to the sump pump and smart monitor before you work on wiring or the pump itself. Turn off the circuit breaker that feeds the pump and confirm power is off with a non-contact voltage tester.
Wear rubber-soled shoes and gloves when you access the sump pit. Keep your phone dry and use a flashlight with a long handle to avoid leaning over the pit.
If the pit has standing water, avoid direct contact and consider calling a technician. Keep pets and children away from the work area.
If you detect a burning smell or visible damage to the monitor or wiring, stop and call a qualified electrician.
Tools and Materials Needed
Have these items on hand before you start: a non-contact voltage tester, a multimeter, a flashlight, rubber gloves, clean rags, and a small screwdriver set. Bring a bucket and sponge if you need to remove water from the pit.
If your smart monitor uses Wi-Fi or a hub, have your phone or tablet, the app installed, and your home Wi-Fi password ready. Keep replacement batteries for any wireless sensors and a notebook to record test results and error codes.
Optional helpful items: a camera to photograph wiring, zip ties to secure loose cables, and a contact cleaner spray for corroded terminals.
Initial Setup and Inspection
Begin with a visual check of the sump pit and all components. Look for loose wires, corrosion on terminals, frayed cables, and any debris that could block the float or sensor probe.
Confirm the monitor is mounted according to the manufacturer’s instructions and not submerged. Check the sensor position: float switches should move freely; probes should be upright and clear of sludge.
Power the monitor back on only after the visual inspection if you need to verify connectivity. Open the app and confirm the device is online, showing correct battery levels, signal strength, and any stored error messages.
Step-by-Step Guide to Sensor Testing
You will verify power and network, simulate rising water to trigger sensors, and confirm alerts reach your phone or control panel. Test each item one at a time so you can isolate faults quickly.
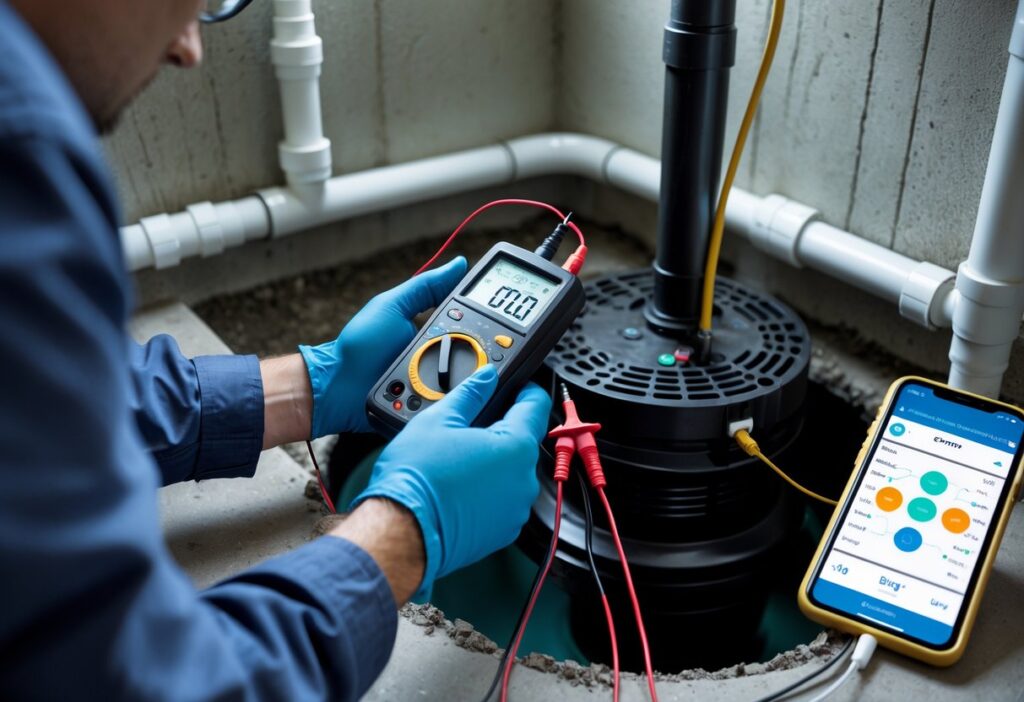
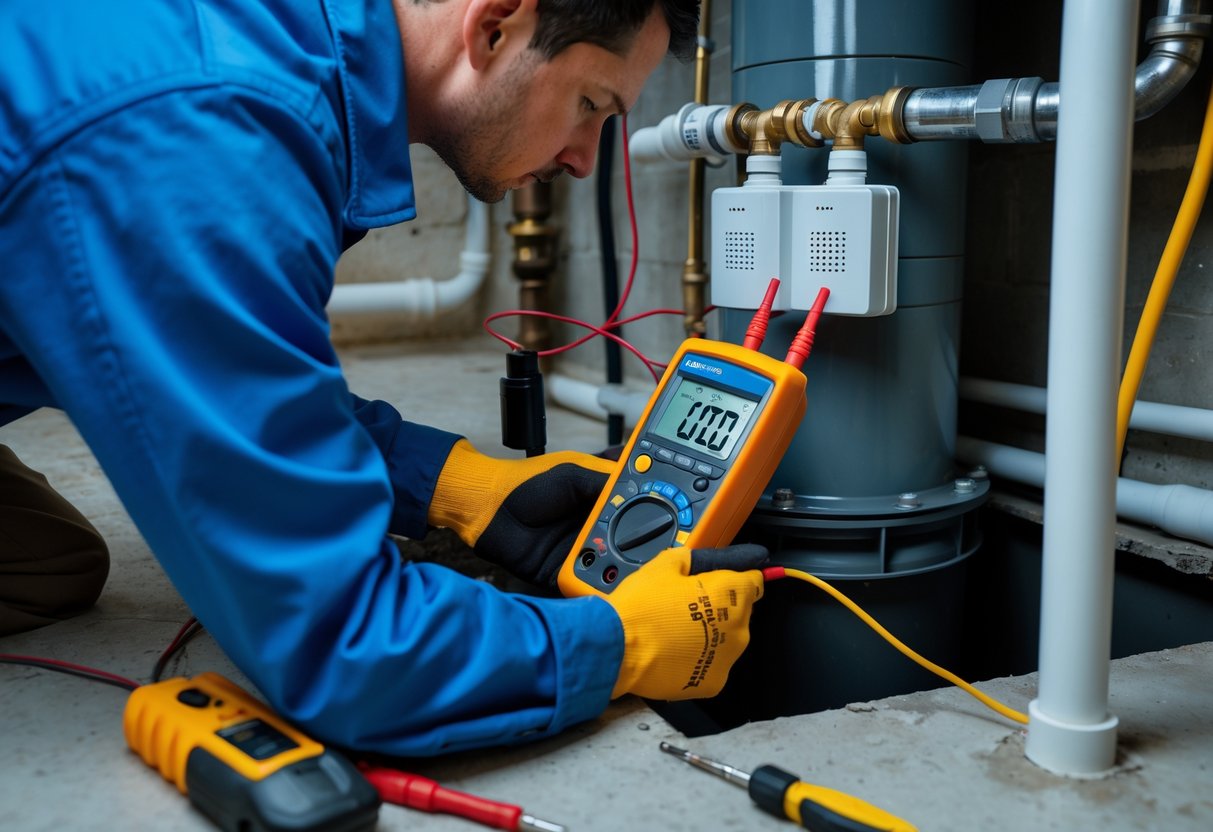
Checking Sensor Power and Connectivity
Start by confirming the sensor has power. For battery-powered sensors, check the battery level in the app or use a multimeter to read voltage.
Replace weak batteries before further testing. For wired sensors, inspect the cable and connector for corrosion or loose pins.
Tighten or reseat connections and test continuity with a multimeter. Next, test wireless connectivity.
Bring the sensor near the hub or router and watch the connection status in the app. If the sensor shows intermittent drops, note the signal strength and distance.
Move the hub, add a repeater, or reposition the sensor to improve reception. Record error codes shown by the device; they point to power or radio issues.
Use any built-in LEDs or diagnostics mode to confirm the sensor boots and communicates. If the device has a tamper switch, trigger it to verify the hub logs the event.
Log all power and connectivity results so you know which step fixed the problem.
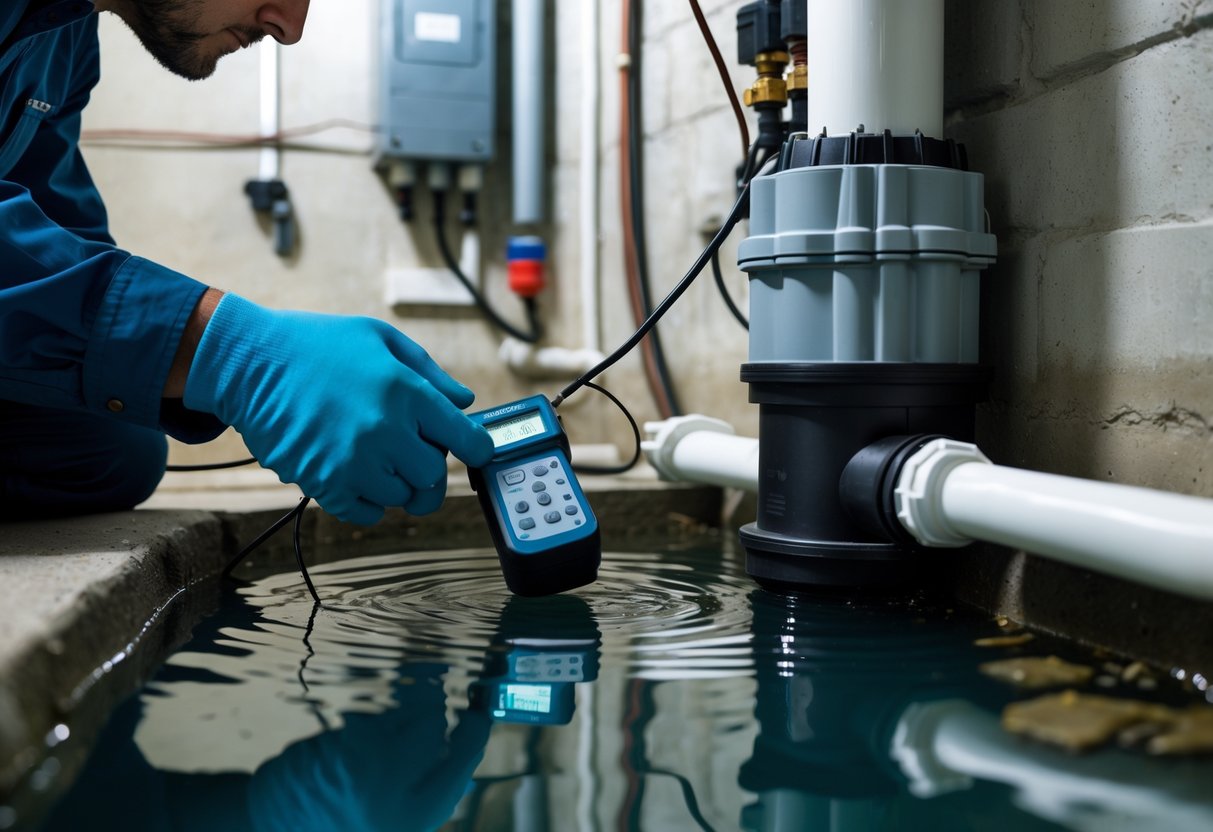
Simulating Water Levels
Prepare a clean container and a non-conductive tool to raise the sensor float or pad safely. For float sensors, slowly lift the float to the trip point while watching the app and local indicator.
For capacitive or ultrasonic sensors, pour water to the calibration mark or use the manufacturer’s test cap. Do not submerge parts that are not rated for full immersion.
Perform the test slowly and watch response times. Note the exact water level or float position when the sensor triggers.
Repeat the test at least twice to confirm consistency. If the sensor fails to trigger, check for fouling, misalignment, or incorrect mounting height.
Document the threshold values and any delay between physical trigger and system reaction. If possible, test under both low and high flow conditions.
Monitoring Alert Systems
Confirm alerts reach every destination you rely on. Send a test alert from the sensor or the app and verify push notifications, SMS, emails, and any third-party smart-home routines activate.
Have a second person check notifications on a separate device to rule out device-specific issues. Check local alarms and sirens if your system includes them.
Trigger the sensor and verify audible and visual alarms sound at expected volumes and durations. For monitored systems, call your monitoring service and inform them you are testing; confirm they log the test and respond appropriately.
Record timestamps for sensor trigger, hub relay, and notification receipt. If delays exceed manufacturer specs, troubleshoot network latency, server issues, or notification settings.
Update contact lists, notification priorities, and retry rules to ensure you receive timely alerts during real events.
Interpreting Test Results
You should be able to tell if a sensor is working, what type of fault it shows, and whether a quick fix or a replacement is needed. Look for specific signs: LED patterns, app alerts, measured water level vs expected, and pump run times.
Troubleshooting Common Sensor Issues
If the sensor shows no power, check the outlet and any inline monitor. Confirm the sump pump still runs when powered directly.
If the sensor’s LED is off but the pump works, the monitor unit or its power cord may be faulty. If you get false alarms, inspect the sensor location.
Remove debris, algae, or float obstructions. For infrared or optical sensors, wipe the lens and reposition the sensor away from splashing water or condensation.
If the sensor reads intermittently, test for loose wiring or a weak Wi‑Fi/bluetooth connection. Note the exact app message and LED pattern — many devices use distinct codes for low battery, signal loss, or sensor fault.
Replace batteries or move the hub closer before replacing hardware.
Validating Sensor Accuracy
Measure the actual water level with a ruler or marked stick while watching the sensor reading in the app. Compare readings at several depths: low, mid, and at the float trigger point.
Record times when the pump starts and stops and compare to the sensor’s logged events. If readings differ by more than about 2–3 cm or the sensor misses a pump cycle, recalibrate or reposition the sensor per the manual.
For smart monitor modules that sit between the outlet and pump, measure pump run time and current draw with a clamp meter to verify the module’s performance data. If repeat tests after repositioning and recalibration still show errors, plan for sensor replacement and keep your logs and screenshots for warranty claims.
Maintenance and Best Practices
Keep sensors free of debris, test them on a schedule, and recalibrate after any cleaning or firmware update. Use a checklist and note dates so you can track sensor performance over time.
Cleaning and Recalibrating Sensors
Turn off power to the pump and sensor before cleaning to avoid false triggers. Remove the sensor from its mount if the model allows; wipe the housing and sensing surface with a soft cloth dampened in fresh water.
Avoid solvents and abrasive tools that can scratch or damage the sensing element. Check for mineral buildup, algae, or grime that can change readings.
For float-style sensors, make sure the float moves smoothly along its shaft. For ultrasonic or pressure sensors, clear any sediment from the intake or probe.
After cleaning, power the system and run a controlled test (see checklist below). If readings differ from expected values, follow the manufacturer’s recalibration steps in the app or manual.
Record the pre- and post-calibration values and the date.
Quick checklist:
- Power off before handling
- Soft cloth + fresh water only
- Inspect mounts and cabling for corrosion
- Reinstall, power on, and run a test pump cycle
- Log results and changes
Scheduling Regular Tests
Test sensors every three months at minimum, and after heavy storms, extended dry spells, or any service work on the sump. Regular tests find gradual drift, battery decline, or wiring issues before they cause a failure.
Create a simple routine: visual inspection, manual trigger test, and remote alert check. For manual trigger, lift a float or add water slowly until the sensor should activate, then confirm the pump and alert messages work.
For smart systems, verify app notifications arrive within the expected time window. Keep a maintenance log with date, person who tested, sensor ID, battery level, and any anomalies.
If a sensor fails repeated tests, replace it or call a certified technician.
Frequently Asked Questions
This section gives step-by-step checks, confirmation methods, common faults, required tools, testing frequency, and safety steps you need to keep your smart sump pump sensor reliable. Each answer focuses on clear actions you can take at home or with a technician.
What steps are involved in troubleshooting a smart sump pump sensor?
Start by checking the sensor’s power and connection. Confirm batteries, power adaptor, Wi‑Fi or cellular link, and any hub are working.
Inspect the sensor and pit for dirt, debris, or corrosion that can block the float or contact points. Clean gently and remove obstructions that stop the sensor from moving or contacting water.
Run a manual test using the manufacturer’s procedure or by raising the float to trigger the sensor. Note whether the app, alarm, or control relay responds correctly.
If the sensor shows no response, reboot the device and any connected hub or router. Reset the sensor per the manual and retest before replacing components.
How can I confirm that my sump pump sensor is functioning correctly?
Trigger the sensor manually by lifting its float or pouring a small amount of water near the sensor if safe to do so. Watch for an immediate notification, alarm, or pump activation.
Check the device app or monitoring portal for real‑time status and recent event logs. Verify timestamps and alerts match your manual test.
Test backup systems and alarms, including battery backup and cellular alert features.
What are common issues that could affect smart sump pump sensor performance?
Low or dead batteries will prevent wireless sensors from reporting. Replace batteries on a schedule or when the device signals low power.
Water, dirt, mineral build‑up, and mechanical binding can stop floats or probes from sensing correctly. Regular cleaning prevents many false readings.
Wi‑Fi interference, weak signal, or hub failures can block alerts and cloud updates. Cellular or dual‑path monitors help when Wi‑Fi is unreliable.
Corrosion or damaged wiring on wired sensors may cause intermittent faults. Inspect cables, connectors, and grommets for wear and water intrusion.
Are there any specific tools required for testing a sump pump sensor?
You only need basic tools for most tests: a small flashlight, screwdrivers, and a soft brush or cloth for cleaning. A towel or bucket helps control water during manual tests.
A multimeter helps check wired sensors for voltage, continuity, and power at terminals. Use it if you suspect wiring faults or power loss.
For network issues, use a smartphone to check app status and Wi‑Fi signal strength. A signal meter or Wi‑Fi analyser app can pinpoint weak coverage near the pit.
How often should a smart sump pump sensor be tested for reliability?
Test your sensor at least twice a year, ideally before spring thaw and before heavy rain seasons. Include both manual sensor tests and app verification.
Inspect the pit and clean sensors every three to six months. Replace batteries according to the manufacturer’s schedule or when low‑battery alerts appear.
What safety precautions should be taken when inspecting a smart sump pump sensor?
Turn off power to the pump and control circuits before touching wiring or terminals. Use lockout procedures if available to prevent accidental startup.
Wear rubber gloves and eye protection when working near water or cleaning the pit. Keep electrical devices and your phone on a dry surface above the pit.
Avoid standing in water during tests. Use a dry platform or step ladder if needed.
If you find exposed wiring, corrosion, or you are unsure, contact a licensed electrician or plumber.